[Guide][Linux]The Android Debug Bridge and Fastboot

Golfdriver97

Trusted Member Team Leader
Moderator
Dec 4, 2012
35,629
613
113
What is Android Debug Bridge (ADB)? What is Fastboot? What can they be used for?

You have probably seen this acronym thrown around in the forums a lot. ADB is a different link from your PC to your phone that uses command lines to do various things to your device.

The things they can do are among the following, but not limited to:
-pushing files to your phone (anything from images, music to OS files)
-pulling files from your phone
-pulling logcats (developers might ask for this when trying to track a bug)
-forcing reboots to the device
-and for Nexus users, ADB can flash stock ROMs.


In this thread, LeoRex and I will show you how to set up ADB and Fastboot on a Linux machine. We will also share some basic commands that most people will use.


Some tips:
-Read the thread very carefully. Missing even the smallest step can cause it not to work at all.
-YouTube videos are very helpful in this instance. There are a lot on YouTube, and I would suggest to watch a few different ones, just to get a feel for what needs to be done.
 
Last edited:
For Linux, I am mainly using Ubuntu 16.04 LTS (I have since first writing this post updated to 16.04), but Linux Mint is closely related to this, and I believe the commands and procedures are the same.

First thing to do is enable USB debugging. To do this, you need to enable developer options. Go to About device>scroll to build number>tap on that several times. You will see a toast notification at the bottom that you are X steps away from being a developer. Keep tapping until it says you are a developer.

Back out one step, and click Developer Options. Scroll about a third of the way down and enable USB debugging.

Now, to prep the Linux machine.

Most, if not all newer Linux distributions (i.e. Mint, Ubuntu, Fedora) already have ADB in the repositories. Meaning part of the work is already done.

For me, on Ubuntu, all I had to do was simply this:
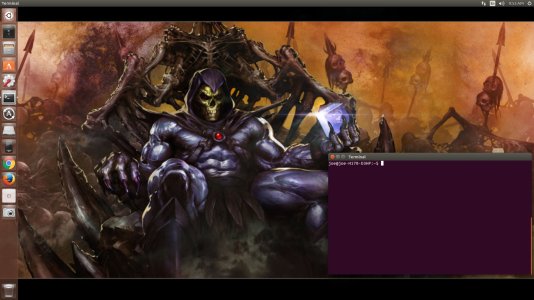
Open a Terminal window.

terminal.jpg

Code:
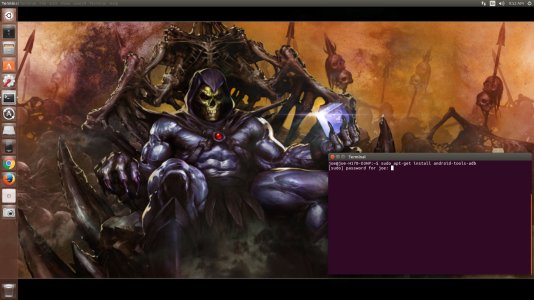
sudo apt-get install android-tools-adb

adb setup.jpg

and then:
Code:
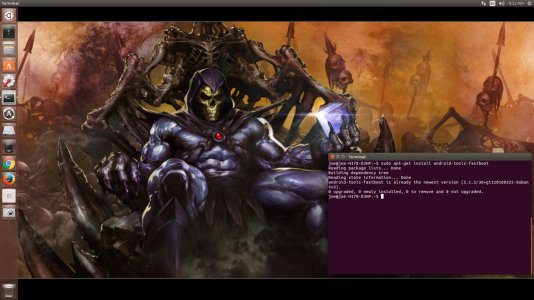
sudo apt-get install android-tools-fastboot

fastboot setup.jpg

Each time you enter the 'sudo' command, you may be prompted for your password. On Ubuntu, it's the first time and it's automatically assumed until the window is closed. I believe there is a time interval if left idle.

After each entry, the PC will download the proper files. This usually goes pretty quick, the files needed in this case are quite small. You may have to confirm the installation by typing Y or yes and pressing enter.

Once all that is set up, you can do a test. Plug your device into your PC. Before doing the terminal commands, pull the notification shade down on the device. You should see a notification for USB. Click on it. This should bring up options as to allow the device to just charge or do file transfers. Depending on the device setup, you may need to do nothing.

After that change is done, you can go back to your terminal window.

Type in:
Code:
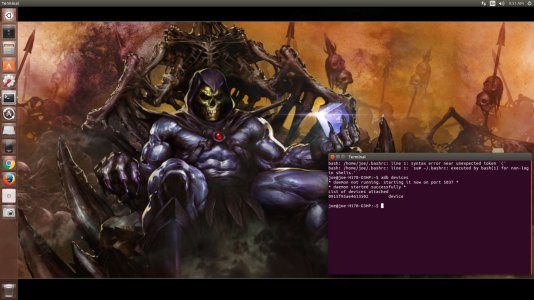
adb devices

Screenshot from 2016-06-27 09-51-08.jpg

This should bring up the serial number of the device and say device. Once you have this result, you can start using adb commands to your device.

Some good ones to play around with:

DPI Changes:
1. You can change the DPI, and root shouldn't be needed.
1a. You can use this command to check the stock DPI setting: adb shell wm density
1b. You can use this command to change it: adb shell wm density 'Numerical Value' && adb reboot
1c. Replace the 'Numerical Value' with your desired DPI setting. Use caution with this...this can cause UI errors and the camera may crash.
1d. A lower DPI will allow more information displayed, and conversely, a higher one will reduce the information displayed.
1e. The && reboot is to reboot the device. Changes like this need the reboot to take effect.
1f. You can reset the DPI by entering: adb shell wm size reset && adb reboot.

Heads up notifications:
2. This will kill all heads up notifications.
2a. Again in the Terminal window, type adb devices to ensure a phone connection.
2b. Type: adb shell settings put global heads_up_notifications_enabled 0
2c. Type: adb reboot
 
Last edited:
Fastboot

Fastboot commands differ from ADB commands in the sense that they are very specific to executing low level commands mean to do things like load a custom recovery or reloading the factory image directly. When someone says "load this image in fastboot", what they are really saying is "Reboot into the bootloader and then load this image using fastboot".

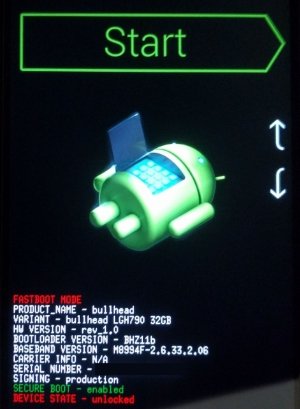
Getting into the bootloader differs from phone to phone, but most commonly it is a combination of holding down several keys at once. For a Nexus phone, that means holding the 'volume down' button as you power on the phone. Now, some custom ROMs include the option to reboot into the bootloader when you hold down the power button, but if you are on a custom recovery, I assume that this guide is no longer needed. :) But if you boot into the bootloader, you will see something similar to this (again, this is a Nexus phone, other phones will have a different screen):

W4eWM9Q2Xat41t0EBKdS6HC1.jpg

Your mileage may vary... This is the bootloader menu on a Nexus 5X and will be consistent with other Nexus devices. Other OEMs use fastboot now (Moto, LG somewhat recently) but their landing screen will be different. But in any case, once you are here, you will run fastboot commands in a command window on an attached computer, very similar to how you can ADB commands. They are structured mostly as such:

Code:
[I]fastboot "rest of command"[/I]
The command set for fastboot is much more limited and focused on dealing with the device's filesystem and loaded software:
Code:
[/FONT][/COLOR]
[FONT=lucida console]commands:[/FONT]
[FONT=lucida console]  update <filename>                        reflash device from update.zip[/FONT]
[FONT=lucida console]  flashall                                 flash boot, system, vendor and if found, recovery[/FONT]
[FONT=lucida console]  flash <partition> [ <filename> ]         write a file to a flash partition[/FONT]
[FONT=lucida console]  flashing lock                            locks the device. Prevents flashing partitions[/FONT]
[FONT=lucida console]  flashing unlock                          unlocks the device. Allows user to flash any partition except the ones that are related to bootloader[/FONT]
[FONT=lucida console]  flashing lock_critical                   Prevents flashing bootloader related partitions[/FONT]
[FONT=lucida console]  flashing unlock_critical                 Enables flashing bootloader related partitions[/FONT]
[FONT=lucida console]  flashing get_unlock_ability              Queries bootloader to see if the device is unlocked[/FONT]
[FONT=lucida console]  erase <partition>                        erase a flash partition[/FONT]
[FONT=lucida console]  format[:[<fs type>][:[<size>]] <partition> format a flash partition.  Can override the fs type and/or size the bootloader reports.[/FONT]
[FONT=lucida console]  getvar <variable>                        display a bootloader variable[/FONT]
[FONT=lucida console]  boot <kernel> [ <ramdisk> ]              download and boot kernel[/FONT]
[FONT=lucida console]  flash:raw boot <kernel> [ <ramdisk> ]    create bootimage and flash it[/FONT]
[FONT=lucida console]  devices                                  list all connected devices[/FONT]
[FONT=lucida console]  continue                                 continue with autoboot[/FONT]
[FONT=lucida console]  reboot [bootloader]                      reboot device, optionally into bootloader[/FONT]
[FONT=lucida console]  reboot-bootloader                        reboot device into bootloader[/FONT]
[FONT=lucida console]  help                                     show this help message[/FONT]
[FONT=lucida console]
[/FONT]
[FONT=lucida console]options:[/FONT]
[FONT=lucida console]  -w                                       erase userdata and cache (and format if supported by partition type)[/FONT]
[FONT=lucida console]  -u                                       do not first erase partition before formatting[/FONT]
[FONT=lucida console]  -s <specific device>                     specify device serial number or path to device port[/FONT]
[FONT=lucida console]  -l                                       with "devices", lists device paths[/FONT]
[FONT=lucida console]  -p <product>                             specify product name[/FONT]
[FONT=lucida console]  -c <cmdline>                             override kernel commandline[/FONT]
[FONT=lucida console]  -i <vendor id>                           specify a custom USB vendor id[/FONT]
[FONT=lucida console]  -b <base_addr>                           specify a custom kernel base address. default: 0x10000000[/FONT]
[FONT=lucida console]  -n <page size>                           specify the nand page size. default: 2048[/FONT]
[FONT=lucida console]  -S <size>[K|M|G]                         automatically sparse files greater than size.  0 to disable
[/FONT][COLOR=#141414][FONT=Georgia]

Now, 99% of the time, the only fastboot commands that you'll have to deal with are the unlock, erase/format and flash commands.

Unlocking your bootloader

Most phones come with a locked bootloader, meaning that there are protections blocking you from flashing system software unless you have a OEM-approved tool to do so. Some phones come out of the box with a locked bootloader but allow you to unlock it... Nexus devices don't need any special handling, but other phones require you to enter in a special code to allow you to unlock the bootloader. I won't go into detail on those because they vary from OEM to OEM and phone to phone. For a newer Nexus device, the unlock command changed, from "fastboot oem unlock" to "fastboot flashing unlock". But the command accomplishes the same task, first, your phone is completely wiped (as if you factory reset) and the bootloader is then unlocked. Subsequent reboots will pop a kind of ominous warning that your phone is now unlocked and can't be checked for consistancy, yadda yadda...

As you can see in the screenshot above, the device state shows as "UNLOCKED", so I've already unlocked the bootloader. Now, on your devices, there may be warranty concerns. Some phones have software fuses that will permanently report that you've unlocked your phone and others even have a flash counter to flag your phone as one that has been modified. Check on your particular model before proceeding.

Flashing System Software

From the bootloader, you can completely overwrite the system software and load a new version. Some phones are easier than others, obviously. Google provides factory images and the instructions to load it (you can find Google's instructions here). Google actually provides all the files as well as a script (in Windows shell and Unix shell script) to do all the heavy lifting for you. You can unpack the image files and flash them manually using fastboot, but this process isn't for the faint of heart since flashing the wrong image on the wrong partition, etc. all can cause problems that may nor may not be easy to fix.

Flashing Custom Recoveries

Outside of loading system images, one of the most common uses for fastboot is loading a custom recovery like TWRP (Team Win Recovery Project). This replaces the very limited stock recovery on most phones with an extremely feature rich recovery application that can handle everything from factory resets to backups to flashing custom ROMs and mods. Instructions for your particular model can be found, along with the custom recovery image, on the TWRP web site.
 
Last edited:

Latest posts

Trending Posts

Forum statistics

Threads
956,245
Messages
6,967,201
Members
3,163,494
Latest member
Jimana