Most, if not all smartphones are coming with various manual controls to adjust things like ISO, exposure time, and focus. This guide is to help you step out of Auto mode and explore a very creative way of using your manual controls. This kind of photography is called light painting.
Here's what you need:
A camera app capable of manual controls. The Play store has third party apps if your stock app doesn't do this, but hardware and ROM limitations for some phones may limit your ability to use manual controls.
Sturdy mount. I use a tripod and a solid metal clamp similar to this: https://www.amazon.com/gp/aw/d/B01LXB7SLO?psc=1&tag=hawk-future-20&ascsubtag=UUacUvbUpU5856438
A dark area, either in a dark room or outside at night. The darker, the better.
Dark long clothing to cover as much as you can.
A light source. I usually use small LED's on a string, but anything will work. Flashlights, sparklers, glow sticks, light saber, Christmas lights, steel wool you lit on fire (a whole topic can be written on the safety of that alone!)... You don't want it very bright, though, or you risk washing out the image.
Patience.
First, some understanding about what's going to happen. When you take a picture, the sensor only exposes pixels that are hit by light. If you've ever taken a black photo because you accidentally left the lens cap on a camera, you should get this concept already. You could leave the shutter open all day, but the final image would still be black if the cap isn't removed. We are going to use this to our advantage, and is why you need as little ambient light as possible and dark clothing. As the sensor is exposing the image, it should only pick up light from your light source. Ambient light isn't a 100% no-no, as you'll see in my examples, but it needs to be at least dark enough the background looks ok when you're finished. From here on, I'll be speaking as if you are in a dark location already.
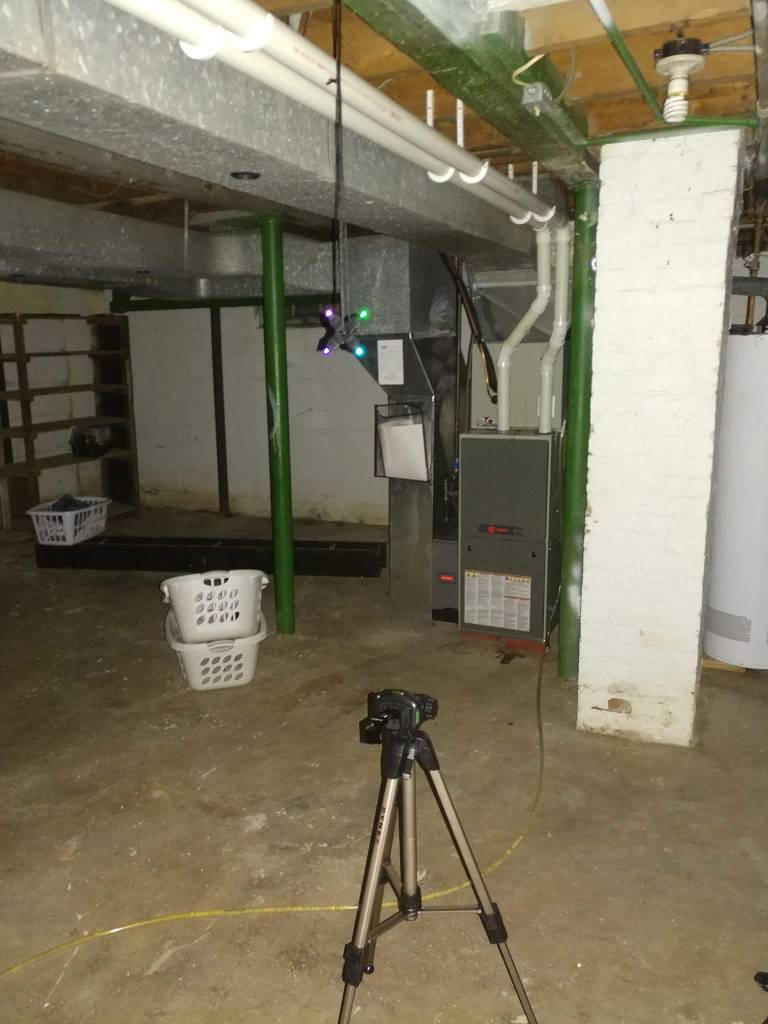
To start, set up your tripod and mount the camera in your desired location. Open your camera app and switch it to your manual mode. You should see a number of new controls pop up. This is what it looks like on the LG V20.
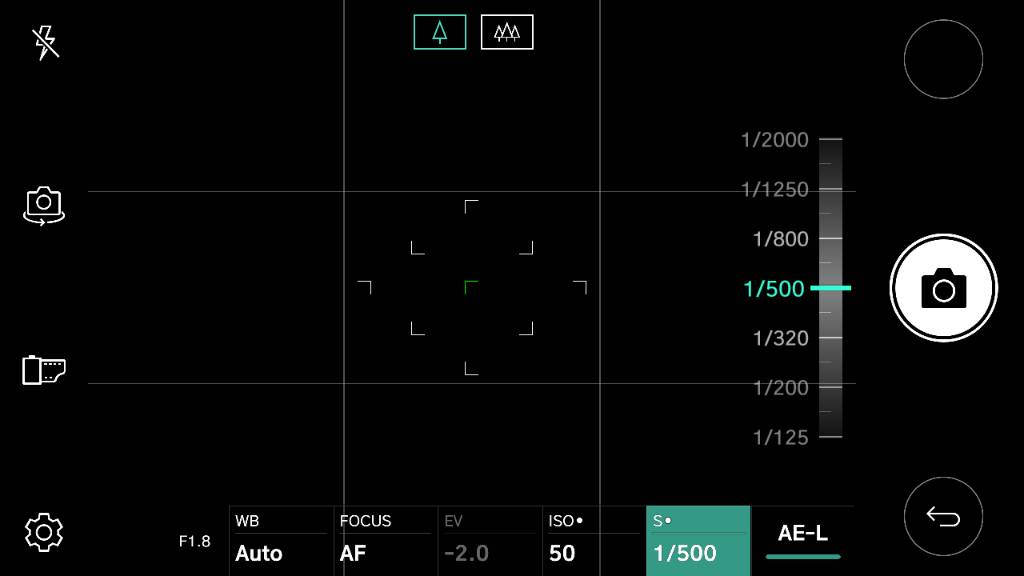
What we need to pay attention to is Focus , ISO, and Shutter (labeled "S" in the bottom row of my app). The other settings can be left at their default/auto settings. The AE-L button is auto exposure lock, which activates when you manually adjust your ISO or shutter. If you get lost, turning this off effectively puts it in an almost auto mode and resets things as the camera thinks is best. First up, focus.
When you start, use a flashlight to light up where you'll be standing. Set focus mode to manual and focus in on that spot. This prevents the camera from trying, and most likely failing, to focus when you go to press the shutter button. When focus is set, you can turn the flashlight off.
Next, set your ISO level to the lowest amount. I don't suggest raising this unless you're needing it for a specific look, because raising it will cause increased image noise.
The shutter time is up to your specific tastes, but most of my shots are between 15-30 seconds long. The longer your shutter time, the more complex and detailed your final image can be. At this point, you can also set up a timer if you need to get into place before the exposure starts.
If you know how to use the Exposure (EV) meter, it won't do much good here, so just ignore it.
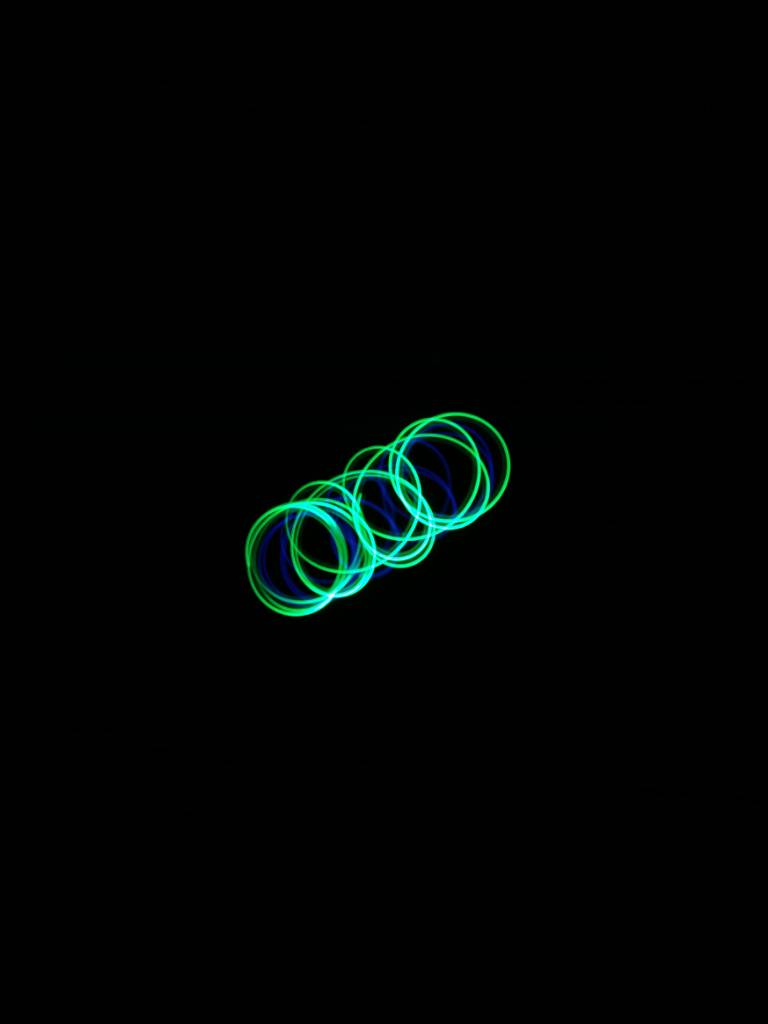
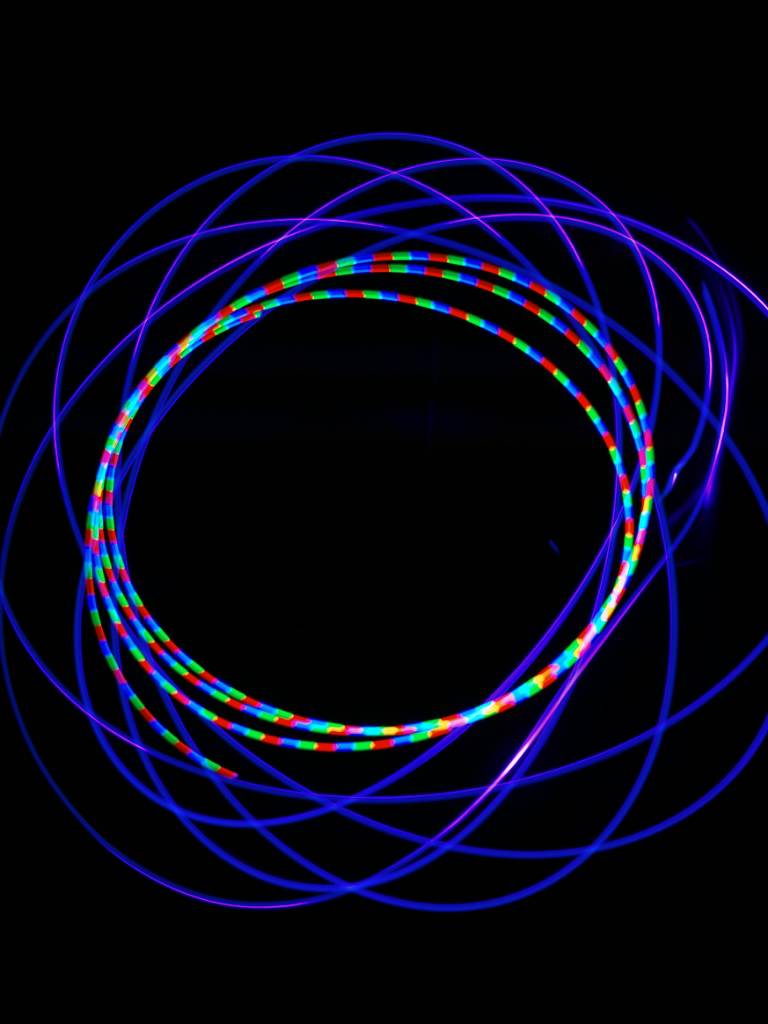
Now for the fun. I'll start with just some random LED spinning.
This was a 10" exposure at ISO 600 with low ambient light. After setting up the shot, I very VERY lightly tapped the shutter button to avoid camera shake and blurring. I then turned on a couple of my LED's on a string and spun them in a vertical circle as I walked past the phone. What's missing?
ME!
Remember what I said about the sensor only picking up light that hits it? By wearing dark clothing and moving quickly, I avoided having enough light reflect off me to be exposed on the sensor. The sensor primarily exposed the background and the relatively bright LED's. If you move too slow, you can get ghosting.
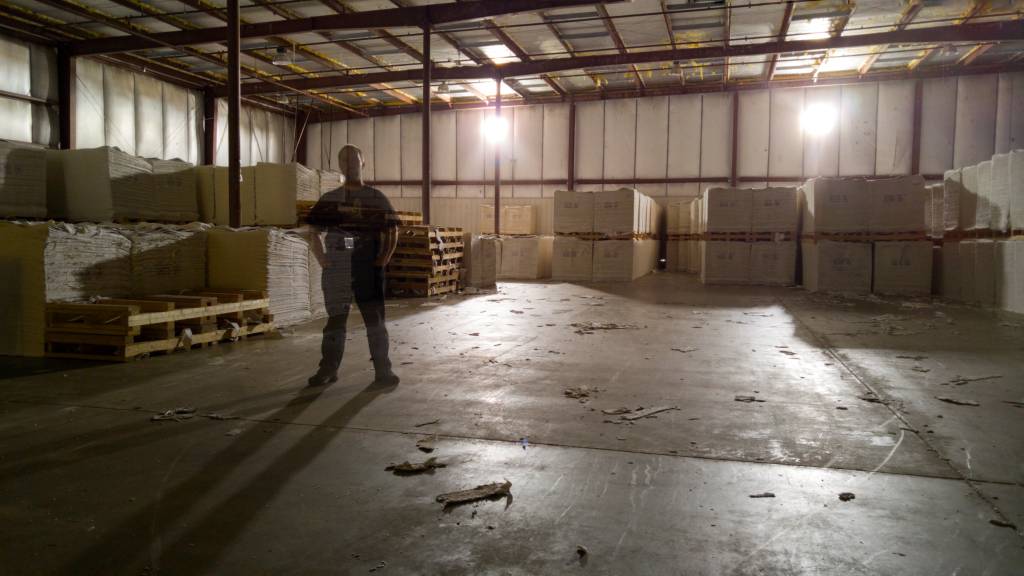
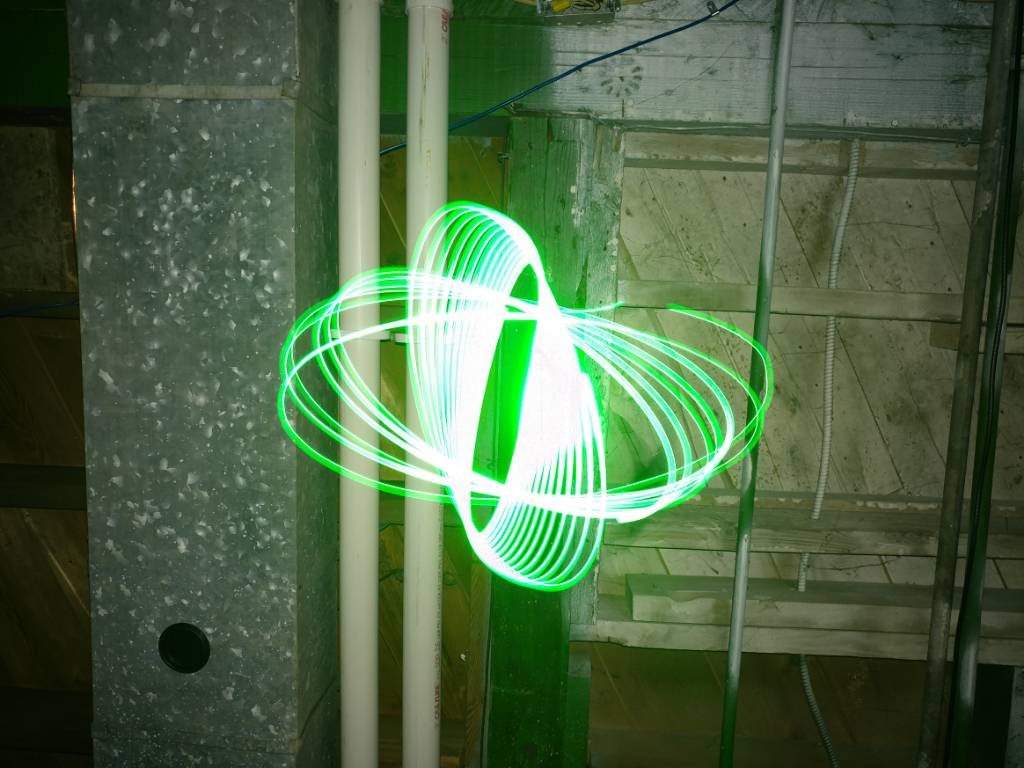
This was shot in a nearly dark warehouse. After starting the exposure, I walked into place and stood still. Because the sensor was given time to pick up light from the back wall and me, I show up transparent. A similar issue can happen with light painting too, either by moving too slow or having too much ambient light. As with anything photography related, you can also break this rule to your benefit like in the warehouse photo.
Feel free to take a break here and go experiment! It's fun to go waving and spinning lights around to see what kind of abstract designs you come up with. You don't have to have them on a string, so let your imagination go.
If you're lucky enough to have a camera with what's called "rear curtain flash," you can take this a little further. The V20 is one phone with this option, but not sure about others. Rear curtain flash will fire the flash right at the end of the exposure to light up the scene plus your light trails.
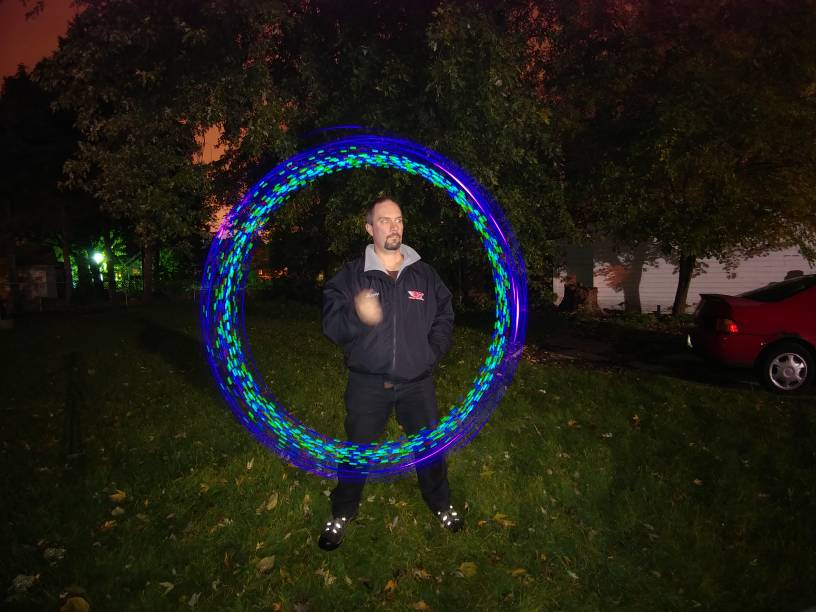
This one was 15" long at ISO 100. So for 14.99999 seconds, I was hardly lit up while I spun the lights. At the very last moment, the flash fired to expose me and partially freeze my body. Due to the limitations of an LED phone flash, it wasn't as quick of a flash as on a dedicated camera, thus my hand is blurry.
Stepping it up a notch is light writing.

This time you have to both move quickly and write mirrored in the air. Because you don't want to block the light, always make sure you are behind the light source. When it comes to writing, this means writing from your right to left and the letters are written backwards. For this, I used the momentary switch on an LED to turn it on only when actively writing a letter. After the"M", I let off the button, moved over, then turned it back on for the first "O". Repeat for the other letters.
I suggest you practice this before actually doing the exposure, as it is tricky. Both the writing and judging where to move. This particular shot was only 20" long, but it took about a half hour of practice writing and failed photos until I got it right. If you really want to get fancy, you could try writing in script/cursive, but that's more than I can do.
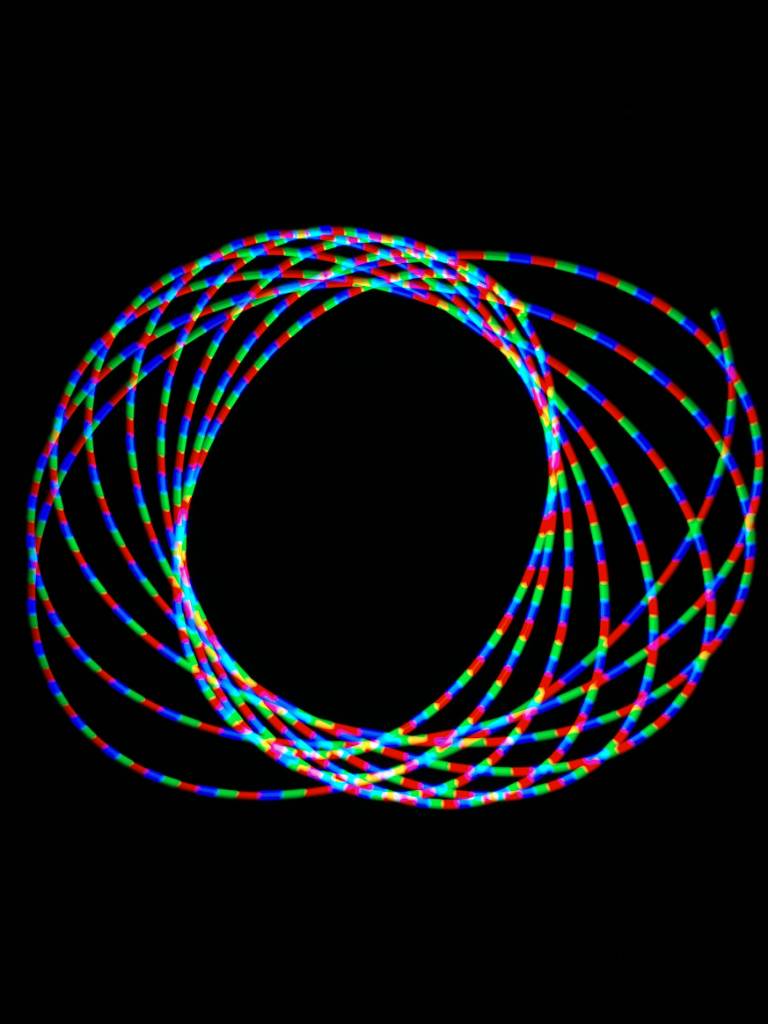
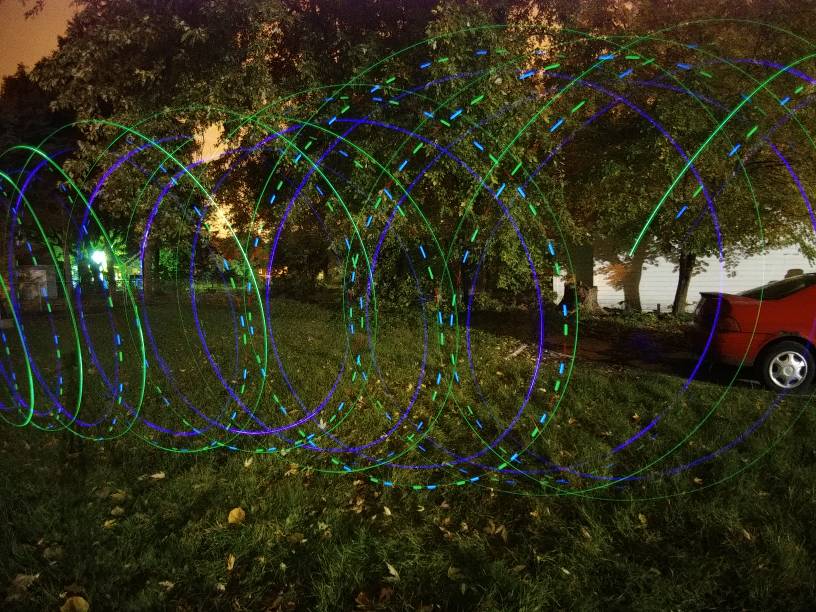
Another very popular technique is called a light orb. For this, you do have to use the timer and a light on a string. Set the timer for about 5 seconds or more. Turn the light(s) you'll be spinning on, then tap the shutter button. Move into position and pick a spot on the ground. This will be your anchor.
Start spinning the light and begin walking slowly in a circle around this anchor point, keeping your spinning hand centered on it. You should be moving when the timer counts down and the exposure starts. Keep moving in the circle until you're sure the exposure time had ended. You'll end with something similar to this.
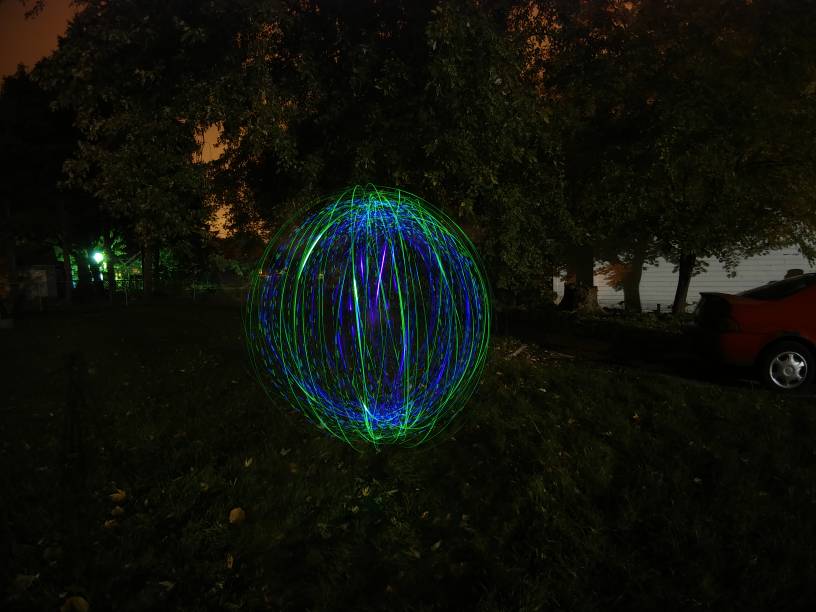
(Note, mine are kinda sloppy due to my lights being a little unbalanced on the string. With practice and a proper setup, they can look much more crisp.)
This will get you started with some basics to build off of. I'll come back later and discuss another technique, making spirograph style images and also how to get more complex effects such as changing lights mid shot. So far, all of the images I've posted were using multiple lights on at once.
Here's what you need:
A camera app capable of manual controls. The Play store has third party apps if your stock app doesn't do this, but hardware and ROM limitations for some phones may limit your ability to use manual controls.
Sturdy mount. I use a tripod and a solid metal clamp similar to this: https://www.amazon.com/gp/aw/d/B01LXB7SLO?psc=1&tag=hawk-future-20&ascsubtag=UUacUvbUpU5856438
A dark area, either in a dark room or outside at night. The darker, the better.
Dark long clothing to cover as much as you can.
A light source. I usually use small LED's on a string, but anything will work. Flashlights, sparklers, glow sticks, light saber, Christmas lights, steel wool you lit on fire (a whole topic can be written on the safety of that alone!)... You don't want it very bright, though, or you risk washing out the image.
Patience.
First, some understanding about what's going to happen. When you take a picture, the sensor only exposes pixels that are hit by light. If you've ever taken a black photo because you accidentally left the lens cap on a camera, you should get this concept already. You could leave the shutter open all day, but the final image would still be black if the cap isn't removed. We are going to use this to our advantage, and is why you need as little ambient light as possible and dark clothing. As the sensor is exposing the image, it should only pick up light from your light source. Ambient light isn't a 100% no-no, as you'll see in my examples, but it needs to be at least dark enough the background looks ok when you're finished. From here on, I'll be speaking as if you are in a dark location already.
To start, set up your tripod and mount the camera in your desired location. Open your camera app and switch it to your manual mode. You should see a number of new controls pop up. This is what it looks like on the LG V20.
What we need to pay attention to is Focus , ISO, and Shutter (labeled "S" in the bottom row of my app). The other settings can be left at their default/auto settings. The AE-L button is auto exposure lock, which activates when you manually adjust your ISO or shutter. If you get lost, turning this off effectively puts it in an almost auto mode and resets things as the camera thinks is best. First up, focus.
When you start, use a flashlight to light up where you'll be standing. Set focus mode to manual and focus in on that spot. This prevents the camera from trying, and most likely failing, to focus when you go to press the shutter button. When focus is set, you can turn the flashlight off.
Next, set your ISO level to the lowest amount. I don't suggest raising this unless you're needing it for a specific look, because raising it will cause increased image noise.
The shutter time is up to your specific tastes, but most of my shots are between 15-30 seconds long. The longer your shutter time, the more complex and detailed your final image can be. At this point, you can also set up a timer if you need to get into place before the exposure starts.
If you know how to use the Exposure (EV) meter, it won't do much good here, so just ignore it.
Now for the fun. I'll start with just some random LED spinning.
This was a 10" exposure at ISO 600 with low ambient light. After setting up the shot, I very VERY lightly tapped the shutter button to avoid camera shake and blurring. I then turned on a couple of my LED's on a string and spun them in a vertical circle as I walked past the phone. What's missing?
ME!
Remember what I said about the sensor only picking up light that hits it? By wearing dark clothing and moving quickly, I avoided having enough light reflect off me to be exposed on the sensor. The sensor primarily exposed the background and the relatively bright LED's. If you move too slow, you can get ghosting.
This was shot in a nearly dark warehouse. After starting the exposure, I walked into place and stood still. Because the sensor was given time to pick up light from the back wall and me, I show up transparent. A similar issue can happen with light painting too, either by moving too slow or having too much ambient light. As with anything photography related, you can also break this rule to your benefit like in the warehouse photo.
Feel free to take a break here and go experiment! It's fun to go waving and spinning lights around to see what kind of abstract designs you come up with. You don't have to have them on a string, so let your imagination go.
If you're lucky enough to have a camera with what's called "rear curtain flash," you can take this a little further. The V20 is one phone with this option, but not sure about others. Rear curtain flash will fire the flash right at the end of the exposure to light up the scene plus your light trails.
This one was 15" long at ISO 100. So for 14.99999 seconds, I was hardly lit up while I spun the lights. At the very last moment, the flash fired to expose me and partially freeze my body. Due to the limitations of an LED phone flash, it wasn't as quick of a flash as on a dedicated camera, thus my hand is blurry.
Stepping it up a notch is light writing.
This time you have to both move quickly and write mirrored in the air. Because you don't want to block the light, always make sure you are behind the light source. When it comes to writing, this means writing from your right to left and the letters are written backwards. For this, I used the momentary switch on an LED to turn it on only when actively writing a letter. After the"M", I let off the button, moved over, then turned it back on for the first "O". Repeat for the other letters.
I suggest you practice this before actually doing the exposure, as it is tricky. Both the writing and judging where to move. This particular shot was only 20" long, but it took about a half hour of practice writing and failed photos until I got it right. If you really want to get fancy, you could try writing in script/cursive, but that's more than I can do.
Another very popular technique is called a light orb. For this, you do have to use the timer and a light on a string. Set the timer for about 5 seconds or more. Turn the light(s) you'll be spinning on, then tap the shutter button. Move into position and pick a spot on the ground. This will be your anchor.
Start spinning the light and begin walking slowly in a circle around this anchor point, keeping your spinning hand centered on it. You should be moving when the timer counts down and the exposure starts. Keep moving in the circle until you're sure the exposure time had ended. You'll end with something similar to this.
(Note, mine are kinda sloppy due to my lights being a little unbalanced on the string. With practice and a proper setup, they can look much more crisp.)
This will get you started with some basics to build off of. I'll come back later and discuss another technique, making spirograph style images and also how to get more complex effects such as changing lights mid shot. So far, all of the images I've posted were using multiple lights on at once.
Last edited:
")