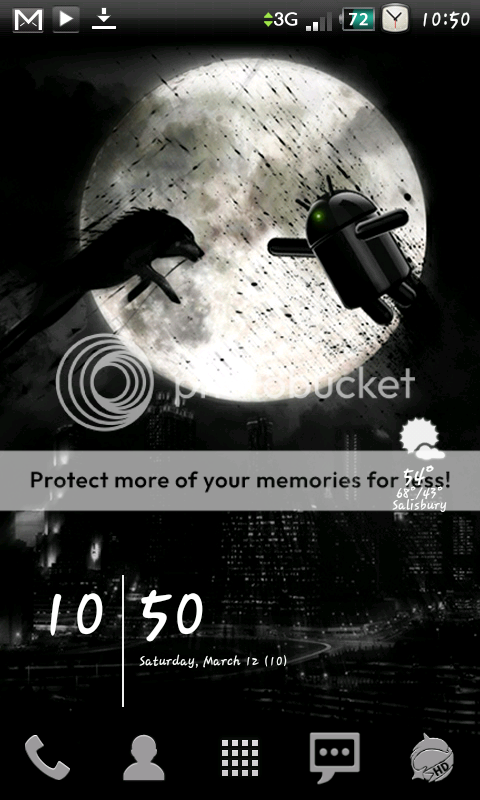
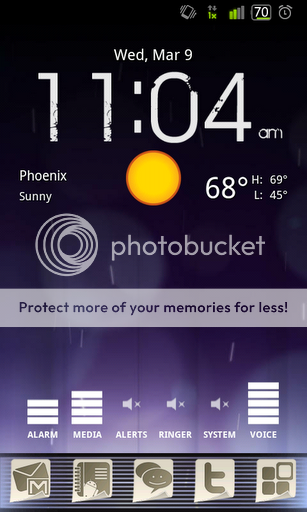
Setting up Honeycomb-style Homescreens
Here we go. I got my inspiration (and instructions) from obsessionXYZ on the i9000 boards at
XDA.
I'm running Super Clean 2.8 (will jump to 2.9 when I get a chance!) along with mob87's Honeycomb theme found
on XDA as well.
First, a few apps you will need.
- Launcher Pro (plus is preferred, but the free version will work just fine)
- Launcher Pro shortcuts (found
here; extract to the root of your SD)
- Desktop VisualizeR (for the Honeycomb-style "recent apps" shortcuts)
- App Icon shortcuts (found
here and
here)
- One More Clock (Honeycomb clock)
In your LP preferences, set your Homescreen Settings to 9 columns and 10 rows. Choose how many homescreens you would like, and set your default screen to whichever you want it to be. If you're going to use any of the LP+ widgets, enable "scrollable widgets" as well.
To set up your dock from left to right:
1. LP preferences>Appearance>Dock background: Select "dock.png" from the Honeycomb_Valle_Images.zip you downloaded before
2. Long-press first dock icon and select: Change shortcut>Launcher Pro shortcuts>home1.lps
3. Long-press again to select the icon: Change icon>Custom>Honeycomb left arrow icon (from zip)
4. For the second icon, long-press and select Change shortcut>Launcher Pro shortcuts> and select the home number that corresponds to whichever homescreen you chose for your default (example, my default screen is 3, so I chose home3.lps)
5. Long-press to Change icon>Custom> and choose the Honeycomb "home" icon
6. The third is a little different; Long-press and select Swipe gesture action>Show screen previews; long-press again to select the Honeycomb "expose" icon
5. Long-press the fourth spot in the dock and select Change shortcut>Blank
6. For the last spot in the dock, long-press and select Change shortcut>App drawer; long-press again to select the Honeycomb app drawer icon
Now that your dock has been set up, you can start setting up your homescreens. This is where you can have your freedom, or follow the steps exactly... Completely up to you!
Homescreen 1: Honeycomb "Recent Apps" and Google search widgets
1. Long-press on the homescreen and select Widgets>Desktop VisualizeR>4x1
A new widget will be placed on your homescreen. Tap it to go into the custom widget creator of Desktop VisualizeR (my new favorite app!)
2. Select your icon (Image File, then choose one of the premade App Shortcut Icons from the previous Honeycomb zip)
3. Select the action (example: if you chose the "browser" icon, then select Launch Application>Browser)
4. For the Label, hit "clear"
5. For the Touch Effect select "None"
6. Long-press the newly created widget to resize (LP+ only) to 5x1 (instead of the 4x1)
7. Repeat for each shortcut widget you wish to create
I used the icon template to create my own custom icons. If you're Photoshop-inclined, have fun with this... I *may* be able to create some custom icons, but I won't make any promises!
Continue to build your homescreens to your liking. When you are done, test out the three icons on the dock to make sure they perform the correct action. The first icon should take you to homescreen 1, the second icon should take you to your default homescreen, and swiping the third icon should take you to the homescreen previews.
")