
My Xoom has been rather unfortunate since I got it. I take it with me everywhere and that includes when I go out drinking with friends... It's taken many a fall. This has shown me what I deem a rather major flaw in the Xoom's design, internally. Allow me to demonstrate:

What you'll need to start... Pardon the crapola pics, I took more than this but the SD card on my Droid is going caput so most of them are just empty jpgs... Luckily the ones I salvaged were able to show the general idea. Anyways. The bit you'll use to take the back shell off is a T-5. The one I have is a T-5H but you don't need one of those, these screws don't have a pin in the middle. That's just for the first 2 screws and the screws that hold the plastic half on, you'll need a T-6 for every other screw in the Xoom. You'll also want some kind of sturdy plastic shims, I used clippings from an old debit card. The tool kit I have pictured can be bought at an auto parts store(I think I picked it up at O'reilly's).

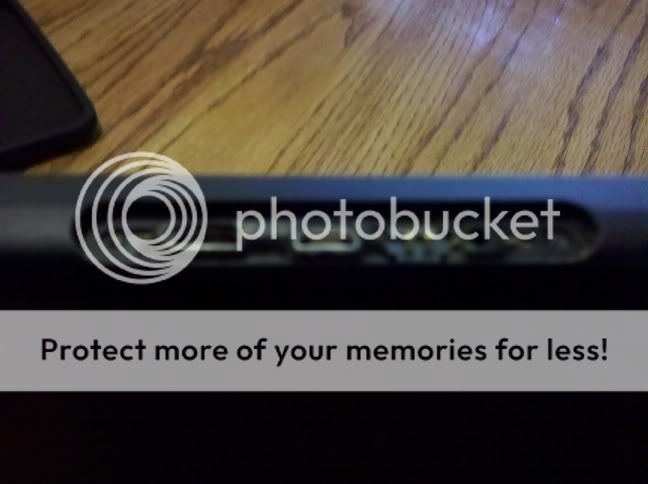
Unscrew the 2 screws that hold the USB/HDMI/charging plate on, this will come off. Keep your screws in a secure location so you don't lose them!
That's what it looks like without the cover.
From here, slide the back cover down, you'll notice it stops at a certain point, just enough to expose the expansion card Moto will replace for the 4G upgrade. They've made this thing super easy to upgrade in the future. Slide the cover back towards closed just a tiny bit so the clips aren't resting on the stop.
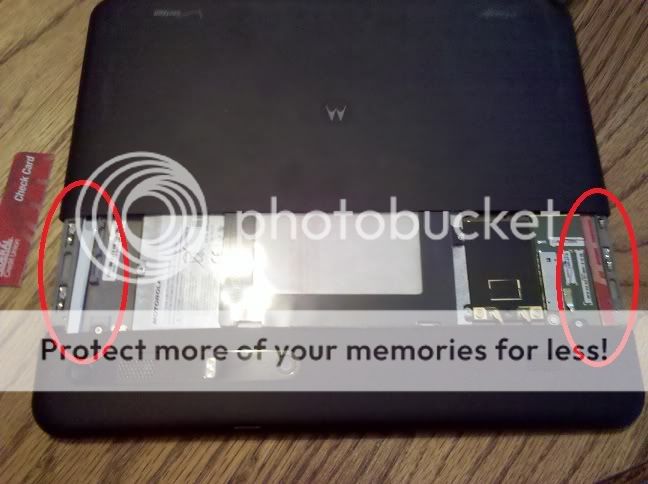
Slide those 2 pieces of plastic into the grooves, as illustrated, until you can't push them in any further, you've disengaged the stops, now, with the plastic still there, slide the cover the rest of the way off.
Here's where my SD card crapped out but it's no big deal. Moving...

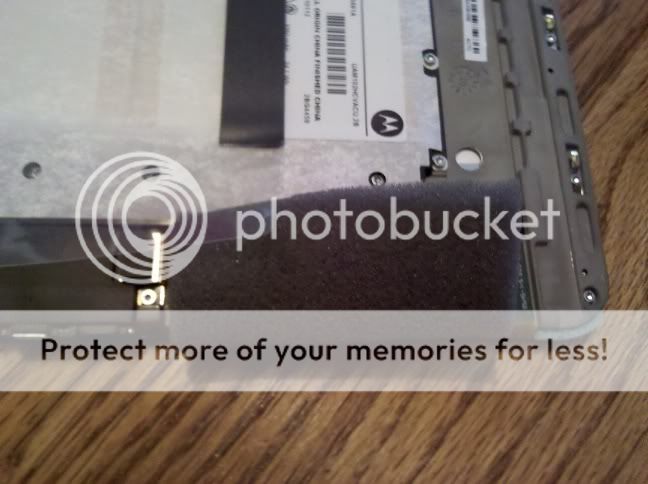
The touchscreen controller is located in the lower right hand corner of the Xoom if you're looking at it from the back. As you can see, mine is dislodged and there's nothing actually securing it inside the Xoom besides double stick tape. The Xoom has like 57 screws inside it and they couldn't screw the touchscreen controller down with even one? No, it's got an adhesive on the back and then it's just pressed onto the metal frame... Not secure in the slightest, even a slight drop can dislodge it. I've already tried to use a better double stick tape, but that came undone, hence I'm doing this write-up.
This is my new solution, using a thin piece of foam doubled over itself. It's about a 2" by 2" square, maybe 1/8" thick or so, couldn't tell you where I got it, I just had it laying around. From here, with it sitting there, it's kind of tricky to get the Xoom back together, what I did was start lining up the back cover with the foam squished down against the touchscreen controller, then slid the cover back to its fully closed position. My foam happened to stay in place during all of this. It may not be that easy for others, YMMV.
So I boot up my Xoom, test it out, touch works again.

I'm still not certain I'm going to stay with this solution but we'll see. For now it's working perfectly. Even exchanging your Xoom for a new one isn't going to resolve this until Motorola actually resolves it themselves, which I doubt they will. Hope this was helpful, I'm not interested in getting into the gory details of full disassembly, that's beyond my pay grade.
I also just realized this solved the problem I was having with the right half of my screen thinking any kind of touch was a multitouch and pinch-zooming constantly. Win.
What you'll need to start... Pardon the crapola pics, I took more than this but the SD card on my Droid is going caput so most of them are just empty jpgs... Luckily the ones I salvaged were able to show the general idea. Anyways. The bit you'll use to take the back shell off is a T-5. The one I have is a T-5H but you don't need one of those, these screws don't have a pin in the middle. That's just for the first 2 screws and the screws that hold the plastic half on, you'll need a T-6 for every other screw in the Xoom. You'll also want some kind of sturdy plastic shims, I used clippings from an old debit card. The tool kit I have pictured can be bought at an auto parts store(I think I picked it up at O'reilly's).
Unscrew the 2 screws that hold the USB/HDMI/charging plate on, this will come off. Keep your screws in a secure location so you don't lose them!
That's what it looks like without the cover.
From here, slide the back cover down, you'll notice it stops at a certain point, just enough to expose the expansion card Moto will replace for the 4G upgrade. They've made this thing super easy to upgrade in the future. Slide the cover back towards closed just a tiny bit so the clips aren't resting on the stop.
Slide those 2 pieces of plastic into the grooves, as illustrated, until you can't push them in any further, you've disengaged the stops, now, with the plastic still there, slide the cover the rest of the way off.
Here's where my SD card crapped out but it's no big deal. Moving...
The touchscreen controller is located in the lower right hand corner of the Xoom if you're looking at it from the back. As you can see, mine is dislodged and there's nothing actually securing it inside the Xoom besides double stick tape. The Xoom has like 57 screws inside it and they couldn't screw the touchscreen controller down with even one? No, it's got an adhesive on the back and then it's just pressed onto the metal frame... Not secure in the slightest, even a slight drop can dislodge it. I've already tried to use a better double stick tape, but that came undone, hence I'm doing this write-up.
This is my new solution, using a thin piece of foam doubled over itself. It's about a 2" by 2" square, maybe 1/8" thick or so, couldn't tell you where I got it, I just had it laying around. From here, with it sitting there, it's kind of tricky to get the Xoom back together, what I did was start lining up the back cover with the foam squished down against the touchscreen controller, then slid the cover back to its fully closed position. My foam happened to stay in place during all of this. It may not be that easy for others, YMMV.
So I boot up my Xoom, test it out, touch works again.
I'm still not certain I'm going to stay with this solution but we'll see. For now it's working perfectly. Even exchanging your Xoom for a new one isn't going to resolve this until Motorola actually resolves it themselves, which I doubt they will. Hope this was helpful, I'm not interested in getting into the gory details of full disassembly, that's beyond my pay grade.
I also just realized this solved the problem I was having with the right half of my screen thinking any kind of touch was a multitouch and pinch-zooming constantly. Win.
Last edited: