- Dec 4, 2012
- 35,723
- 785
- 113
File extraction....Wait...what... This seems more like a guide for a PC forum, than Android, right? Well, to a degree, we all carry a miniature computer around in our pockets, the Android Operating System, ran by Linux.
The thing is, there have been times where I needed to extract files from a compressed one in order to do something for my phone. Especially, if it involves using Odin. Some examples of uses for this would be: files required for root (depending on root method), flashing stock ROMs for Samsungs, etc...
For more info about how to use Odin: http://forums.androidcentral.com/am...ide-samsung-how-flash-stock-rom-via-odin.html
Many times, downloaded files are in some sort of zipped (compressed) form, and they need to unzipped in order to be used. This is where a file extraction program can be very handy.
If you are running a Windows PC, Windows has an extraction program already. Here is the thing: sometimes, it isn't always compatible with the file you want to unzip. So it is always nice to have a secondary.
[INFO]I personally use 7Zip, and this is the program that I will be using.[/INFO]
The first step is obviously downloading your file. When done, I would suggest to move it to your desktop.
Second step is setting up your destination folder. A destination folder is where you want the file to end up. The default on many extraction programs is the same folder it is already in.
[TIP]You can leave your destination folder in any location. However, I do suggest when setting up a destination folder to place it on the desktop. This makes it easier to find when you need to navigate to the file you need later.[/TIP]
To do this, you can simply right click on your desktop, and it will bring up a menu with options.
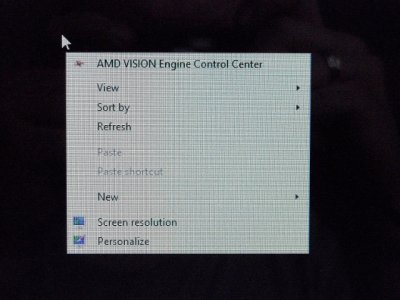
First, right click on any empty place on your desktop. Click on New.
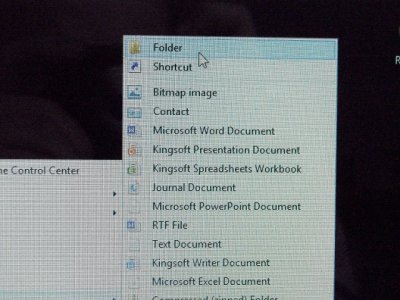
Now, click on Folder.
You can click on New Folder. When that comes up, I would rename it to anything that you will remember.
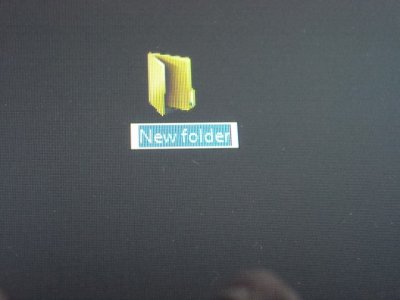
This is what you will see. You can then edit the folder name.
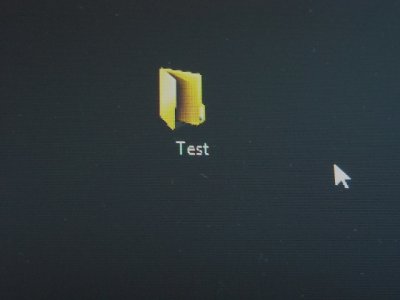
You can name it anything, I just simply chose Test.
The next series of steps is actually unzipping the file. To do this, you can open up 7Zip, and then you will need to navigate to your file location. That is, the file you need to extract.
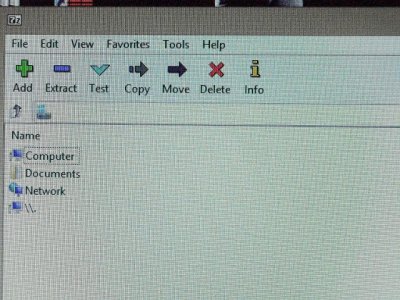
Click on Computer...
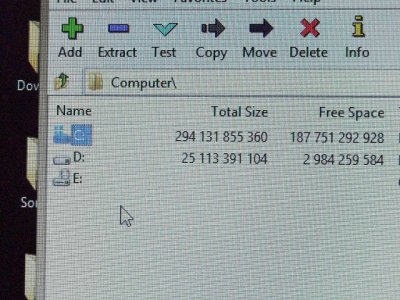
Click on C: Drive...
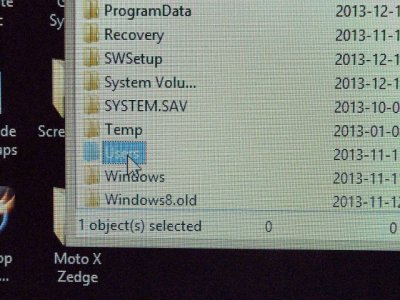
Then Users...
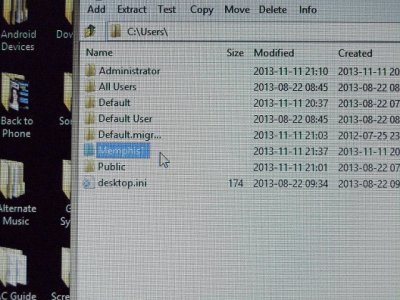
Click on the user that downloaded the file...
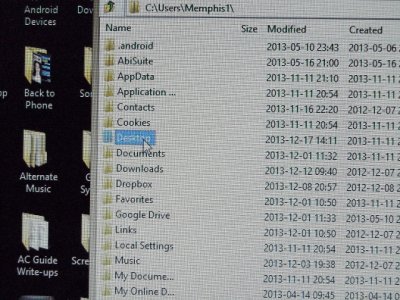
Click on the location of the file. If you left it in Downloads it may be there.
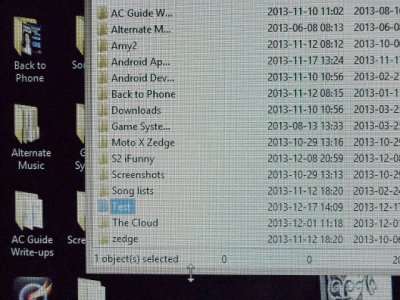
Click on the file, in this case I used the Test folder...
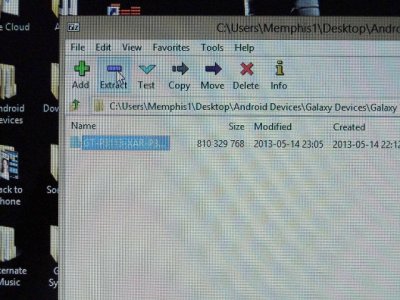
I chose a file that was already zipped. Just highlight it with a single click, and click on Extract.
Next step is to click the Extract button on the program. This is where it will ask where you want the file to extract to. Here, again, is where I would suggest to have the destination folder already in place. The default is the same folder, to select a different location, you can click the box with the 3 dots in it to choose. This action brings up a window with a 'tree' that has all possible paths connected to it. Navigate to your desktop, and select the folder that you created.
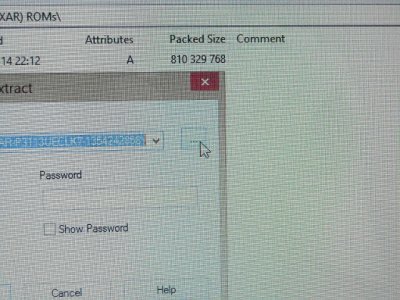
To select a different folder, click on this 3 dot button...
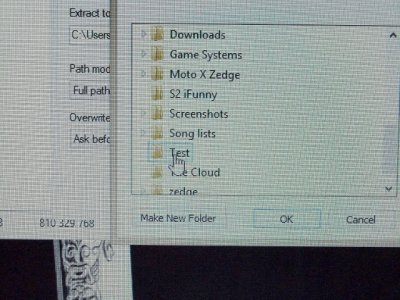
...Which will bring up this tree, possibly already set to your desktop. Just scroll down to where your folder is, in this case, Test...
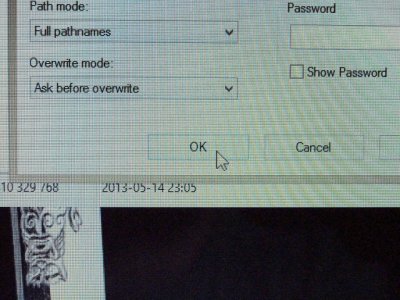
...at this point, everything should be set. Click OK to continue...
Once the location is selected, you can click Extract. The program takes care of the rest.
[NOTE]Now, depending on the file size, and the hardware of your PC, this may take several minutes. This would be your chance to go grab a refill on your coffee.[/NOTE]
Once it is done, you may use the file for what you need. Since you already have a compressed copy of the file, you can delete the uncompressed one to save space on your PC.
[INFO]Typically, I leave the folder on my desktop until I am done with it, then I file it away appropriately. When I need the unzipped file again, I will drag it to my desktop.[/INFO]
The thing is, there have been times where I needed to extract files from a compressed one in order to do something for my phone. Especially, if it involves using Odin. Some examples of uses for this would be: files required for root (depending on root method), flashing stock ROMs for Samsungs, etc...
For more info about how to use Odin: http://forums.androidcentral.com/am...ide-samsung-how-flash-stock-rom-via-odin.html
Many times, downloaded files are in some sort of zipped (compressed) form, and they need to unzipped in order to be used. This is where a file extraction program can be very handy.
If you are running a Windows PC, Windows has an extraction program already. Here is the thing: sometimes, it isn't always compatible with the file you want to unzip. So it is always nice to have a secondary.
[INFO]I personally use 7Zip, and this is the program that I will be using.[/INFO]
The first step is obviously downloading your file. When done, I would suggest to move it to your desktop.
Second step is setting up your destination folder. A destination folder is where you want the file to end up. The default on many extraction programs is the same folder it is already in.
[TIP]You can leave your destination folder in any location. However, I do suggest when setting up a destination folder to place it on the desktop. This makes it easier to find when you need to navigate to the file you need later.[/TIP]
To do this, you can simply right click on your desktop, and it will bring up a menu with options.

First, right click on any empty place on your desktop. Click on New.

Now, click on Folder.
You can click on New Folder. When that comes up, I would rename it to anything that you will remember.

This is what you will see. You can then edit the folder name.

You can name it anything, I just simply chose Test.
The next series of steps is actually unzipping the file. To do this, you can open up 7Zip, and then you will need to navigate to your file location. That is, the file you need to extract.

Click on Computer...

Click on C: Drive...

Then Users...

Click on the user that downloaded the file...

Click on the location of the file. If you left it in Downloads it may be there.

Click on the file, in this case I used the Test folder...

I chose a file that was already zipped. Just highlight it with a single click, and click on Extract.
Next step is to click the Extract button on the program. This is where it will ask where you want the file to extract to. Here, again, is where I would suggest to have the destination folder already in place. The default is the same folder, to select a different location, you can click the box with the 3 dots in it to choose. This action brings up a window with a 'tree' that has all possible paths connected to it. Navigate to your desktop, and select the folder that you created.

To select a different folder, click on this 3 dot button...

...Which will bring up this tree, possibly already set to your desktop. Just scroll down to where your folder is, in this case, Test...

...at this point, everything should be set. Click OK to continue...
Once the location is selected, you can click Extract. The program takes care of the rest.
[NOTE]Now, depending on the file size, and the hardware of your PC, this may take several minutes. This would be your chance to go grab a refill on your coffee.[/NOTE]
Once it is done, you may use the file for what you need. Since you already have a compressed copy of the file, you can delete the uncompressed one to save space on your PC.
[INFO]Typically, I leave the folder on my desktop until I am done with it, then I file it away appropriately. When I need the unzipped file again, I will drag it to my desktop.[/INFO]
Last edited:

