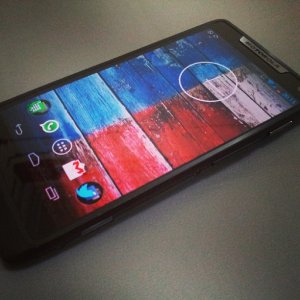
Alright guys, my speaker assembly has arrived.
DISCLAIMER: ATTEMPT AT YOUR OWN RISK.
If you choose to use this walkthrough as a guide, and damage your device in the process, I will not be held responsible. This is only my attempt at sharing information that I couldn't find anywhere on the internet, along with how I change the housing of the phone. I did this to my own device and it is still working perfectly now. But this is NOT meant to be an official teardown, tutorial, or guide.
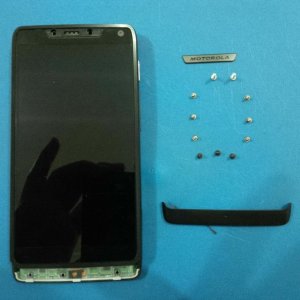
- Basically what all teardown video will tell you. 3 torx screws on both sides.
- Remove the Motorola logo at the top gently, it is held down by adhesive. Be careful not to bend the metal plate if you want to reuse. Hot air gun/Hair dryer helps. 2 Torx screws there.
- Pry the bottom chin open gently, there are slight adhesive. 3 torx screws.
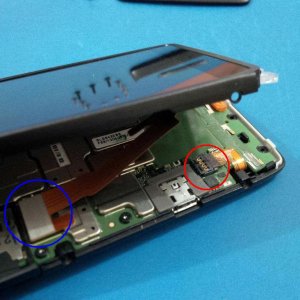
- I prefer to remove the battery connector (red circle) first. Simply pry it upwards.
- The other connector (blue circle) is for the display assembly. Pry it upwards as well. Afterwards the top and bottom will be separated.
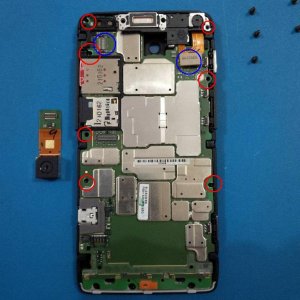
- 2 more connectors in blue circles, one for the rear camera, the other for the call speaker and front camera.
- 7 more torx screws on the board in red circles
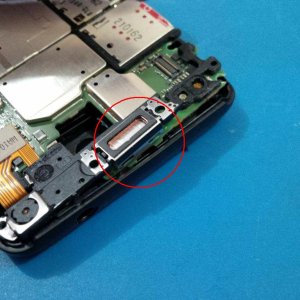
- Here's a tricky part I found. I lifted the board from the bottom a little, then at the front camera and speaker assembly at the top, push it upwards away from the board to try and separate it from the board a little. If you see the image above in the area highlighted, you can see how it latches on the board.
- DO NOT try to yank this assembly out just yet. Just lift it up a little.
- The lift the main board a little and then try to release the main board. The tricky part would be right under the front camera assembly.
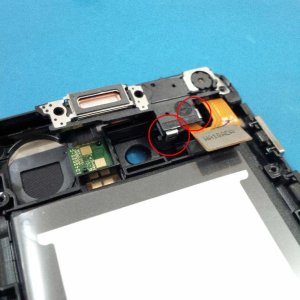
- Now we remove the speaker and front camera assembly.
- The red circle highlights the area that latches the top assembly with the bottom case.
- Hold the assembly on the left side, and push it down a little to release the bottom latch, and then push to the right to release the one on the right.
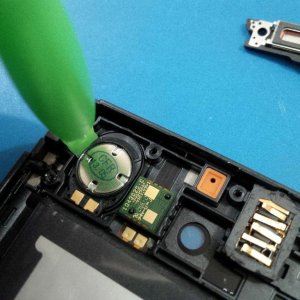
- To remove the speaker apply hot air on the bottom to soften the adhesive first.
-Then gently pry the speaker form the left as shown. (Make sure to pry gently all the way from the bottom. If you read my post above, i broke mine because I wasn't. Learn from my mistake)
- Just go really slow.
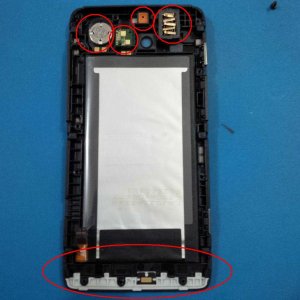
- My new casing came with NFC, but not much else. The red circles highlights the things I had to move myself to the new housing.
- Speaker, LED Flash (just lift it out), a orange/brown rubber like thing I assume to help with the call speaker (Just lift it out as well), The earphone jack assembly (same process as the speaker, apply lots of hot air). The jack has 2 parts, after removing the main assembly, there is a small piece that is the "ring" you see when looking at that port from the outside.
- Of course most importantly is the battery, apply hot air to soften adhesive (lots of it, and very strong) and slower pry it out. I don't think I need to say to be careful. right?
Next up the Front display assembly.
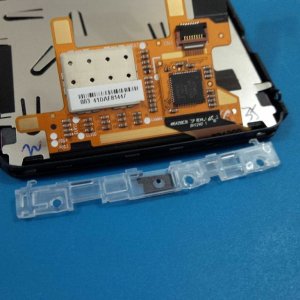
Remove the bottom translucent piece of plastic. Remove one end follow by the other. It's just a simple latch as shown in the image.
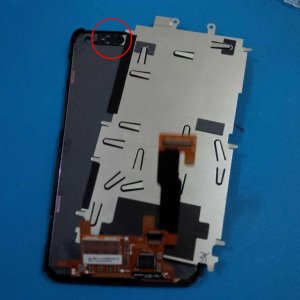
- Remove the metal plate by slowly lifting it up. The red circle indicates the area with a bit of adhesive.
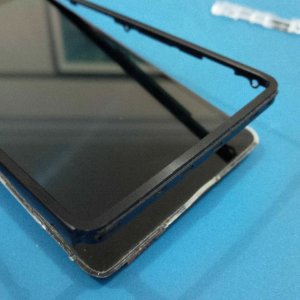
- Separating the front metal bezel. DO THIS AT YOUR OWN RISK, as far as I can tell, it's irreversible. Once separated, the seal/adhesive WOULD NOT stick back together properly anymore. This meant that the device would not be as splash resistant as before. So DO NOTE THIS.
- Hot air the metal frame till hot (wearing gloves of course, since glass and metal isn't the nicest to hold when hot)
- Push the display down from the bezel. If the seal has soften, you should be able to separate it. Slowly repeat the process around the frame.
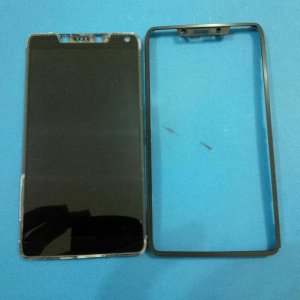
Voila, separated. You can try to fit the new bezel over the existing seal and apply heat to try to get it to stick a little, but trust me, it won't be much. In the end I opted to just use double sided adhesive tape to stick them together.
AGAIN, ATTEMPT AT YOUR OWN RISK.
